Library Management
Last updated: August 25, 2026
Library Permissions
Library Permissions give you more control over how content is shared and accessed across your organization. You can now set folder-level permissions that determine visibility based on a user's role or location — so the right people see the right content, without extra friction.
⚠ Important
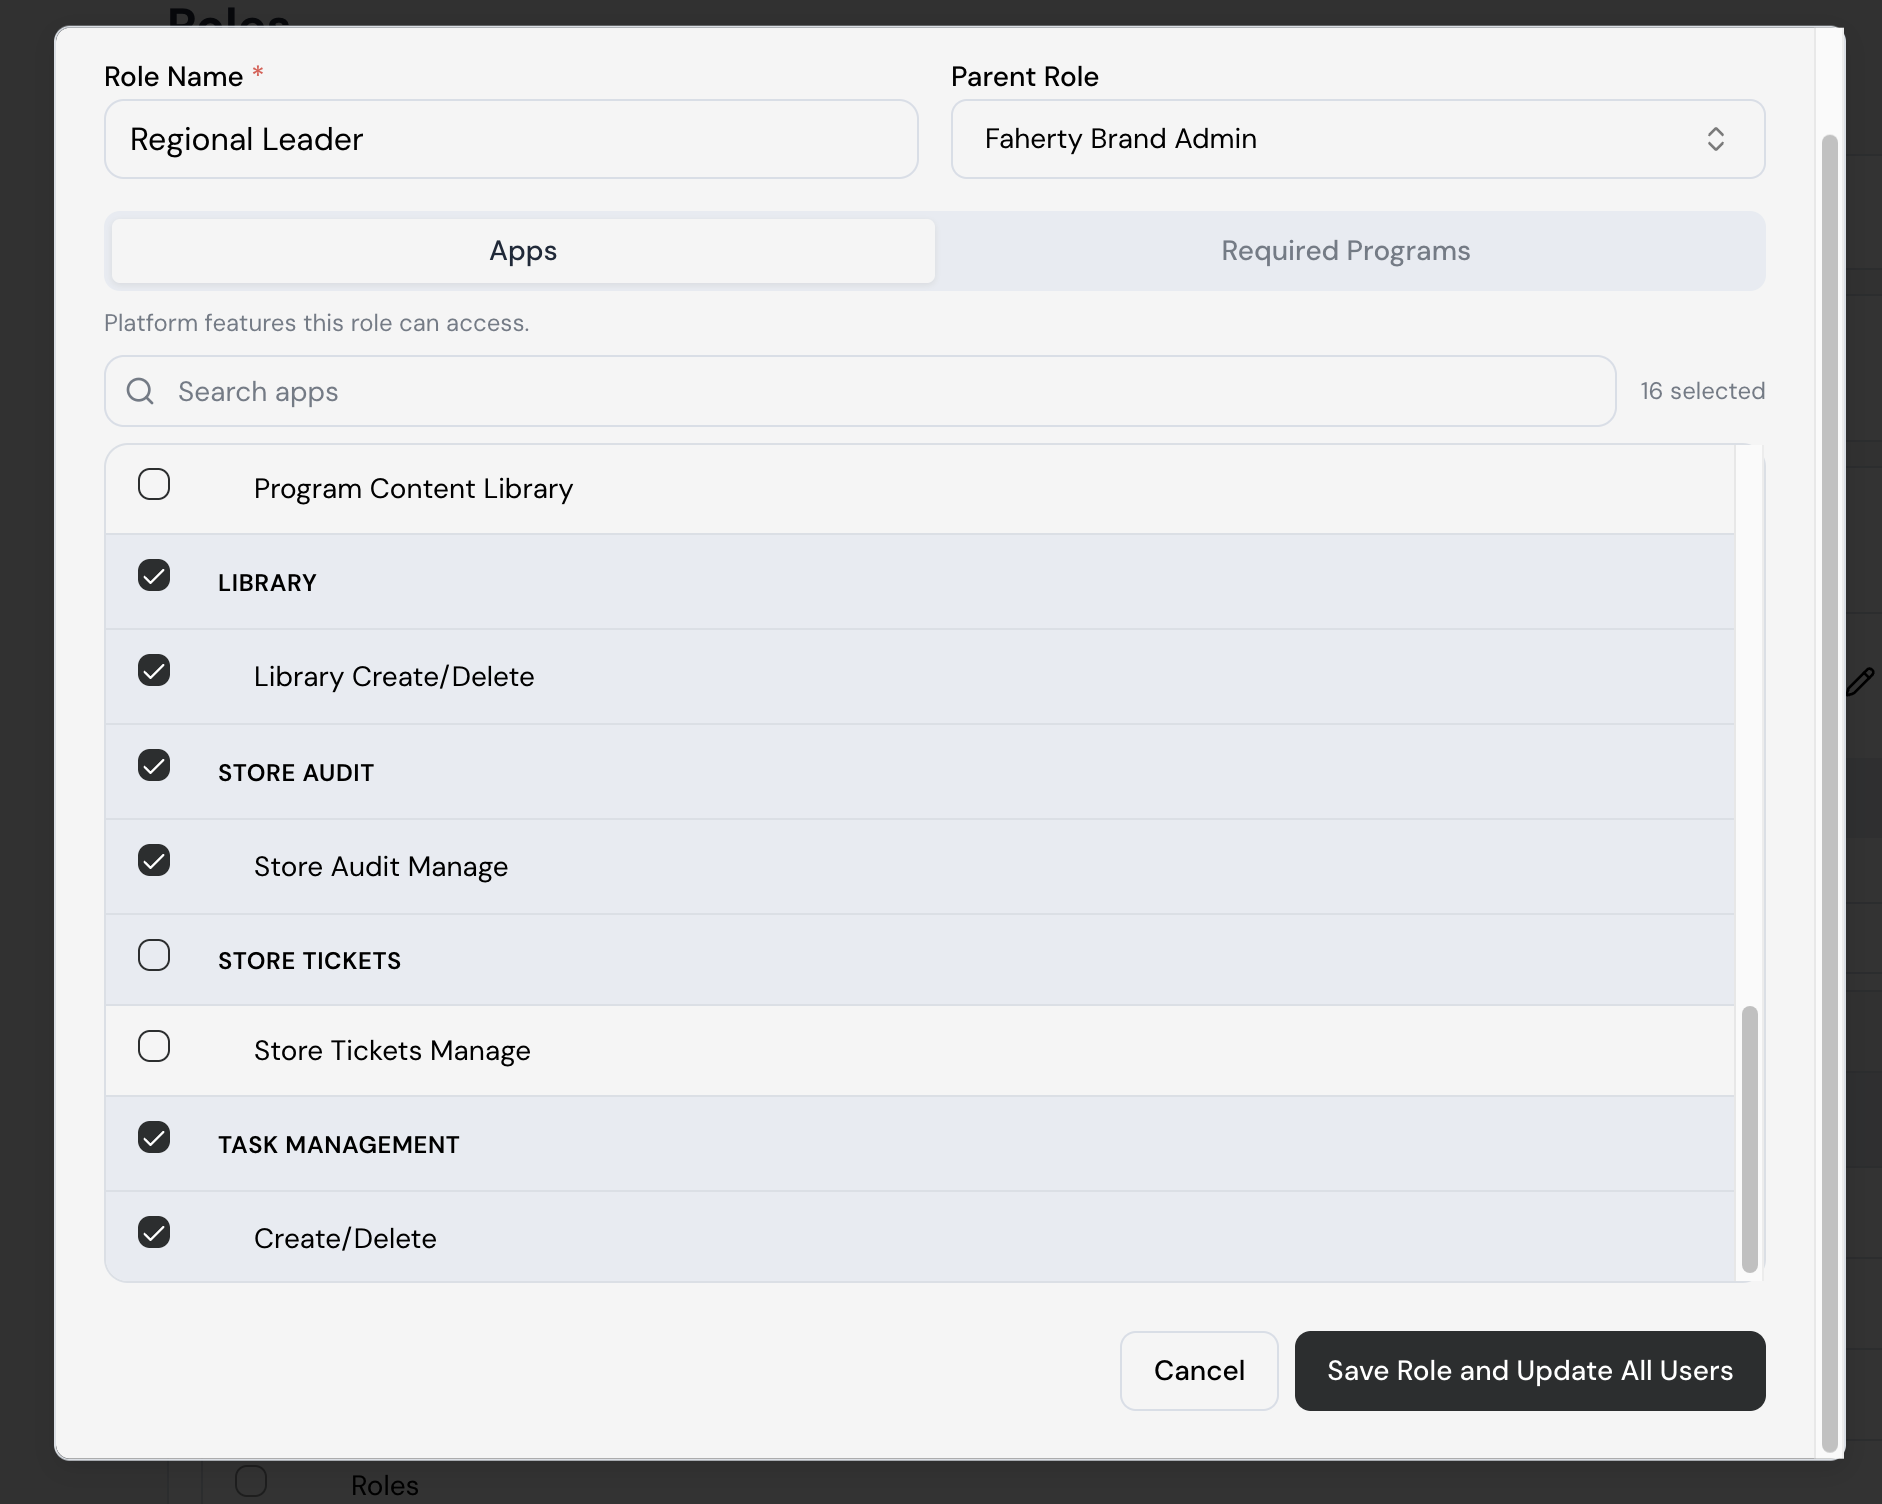
As of July 1st, 2026, a new "Library: Create/Delete" permission was installed and disabled for all users by default as part of this update. If users in certain roles need the ability to create or delete Library content, you'll need to re-enable this permission for those roles in your Admin settings.
What's included in this Article:
Folder-level permissions based on role and location
Copy Link to Folder — share a direct link to any folder in the Library
Copy Link to File — share a direct link to any individual file
New "Library: Create/Delete" permission (disabled by default — see above)
Creating a New Folder
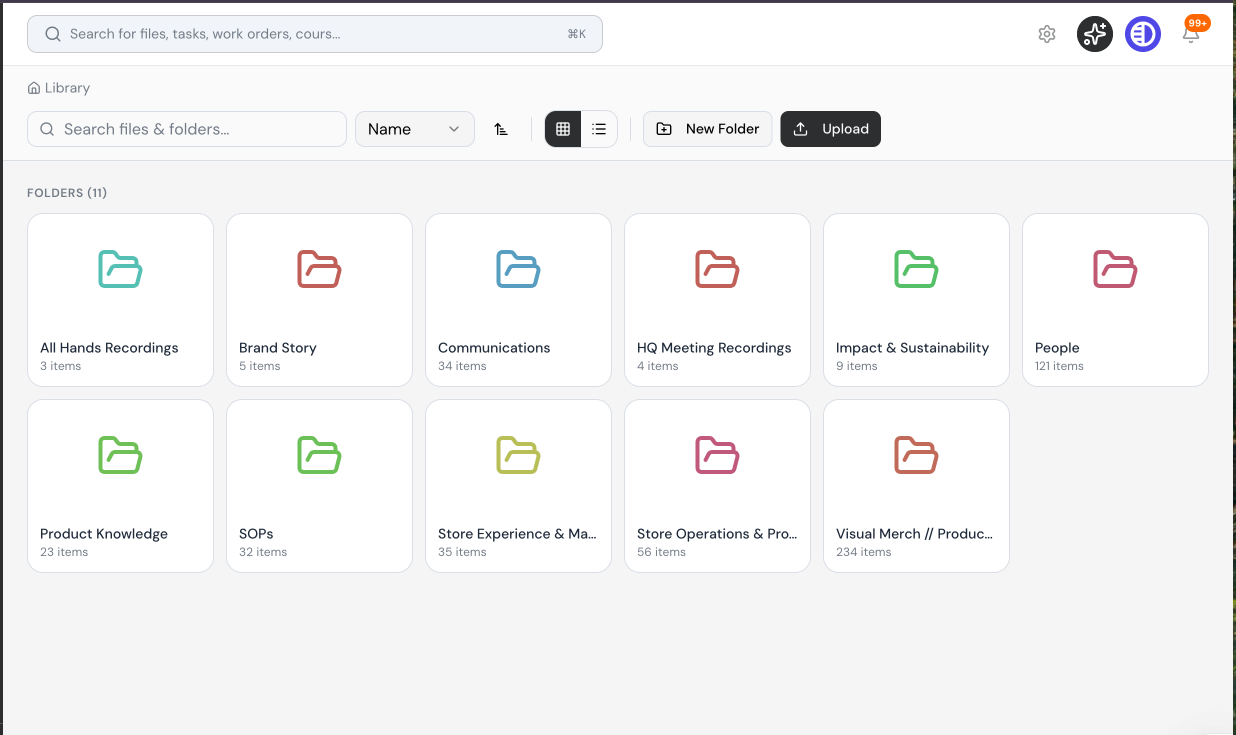
Uploading a New Folder/Searching for Folder
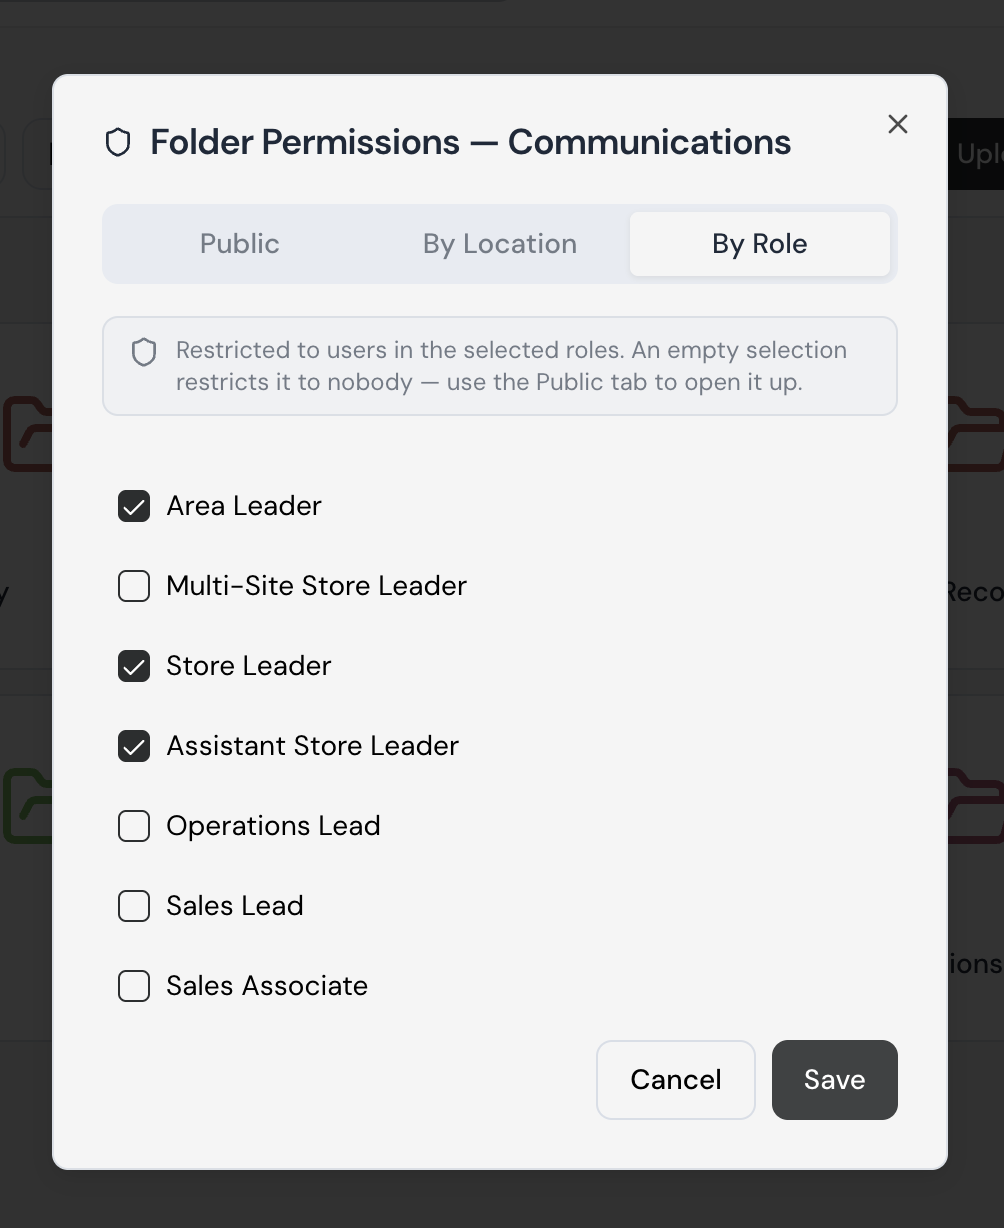
How to set folder permissions
Navigate to the Library from the main menu.
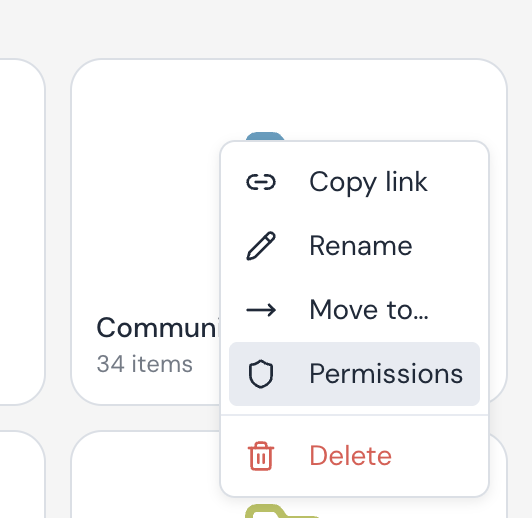
Locate the folder you want to restrict, then click the three-dot menu next to it.
Select Folder Permissions from the dropdown.
Assign access by role (e.g., Store Manager, District Manager) or by location.
Click Save. Changes take effect immediately.
Users who don't have permission to view a folder won't see it in the Library at all — the folder is hidden, not just locked.
How to share a folder or file link
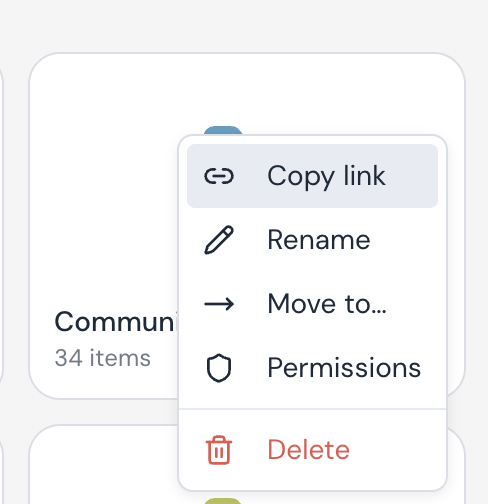
Copy Link to Folder
Open the Library and locate the folder.
Click the three-dot menu next to the folder name.
Select Copy Link to Folder. The link is now in your clipboard.
Shared links respect folder permissions — recipients who don't have access to a folder won't be able to open links that point to content inside it.
How to re-enable "Library: Create/Delete"
Go to Admin from the main navigation.
Select Roles & Permissions.
Choose the role you want to update.
Locate the Library section and toggle on Library: Create/Delete.
Click Save Role & Update All Users.
Uploading Files & Creating Folders in the Library
Keep your Library organized by uploading content and creating folders directly from the Library view.
Creating a new folder
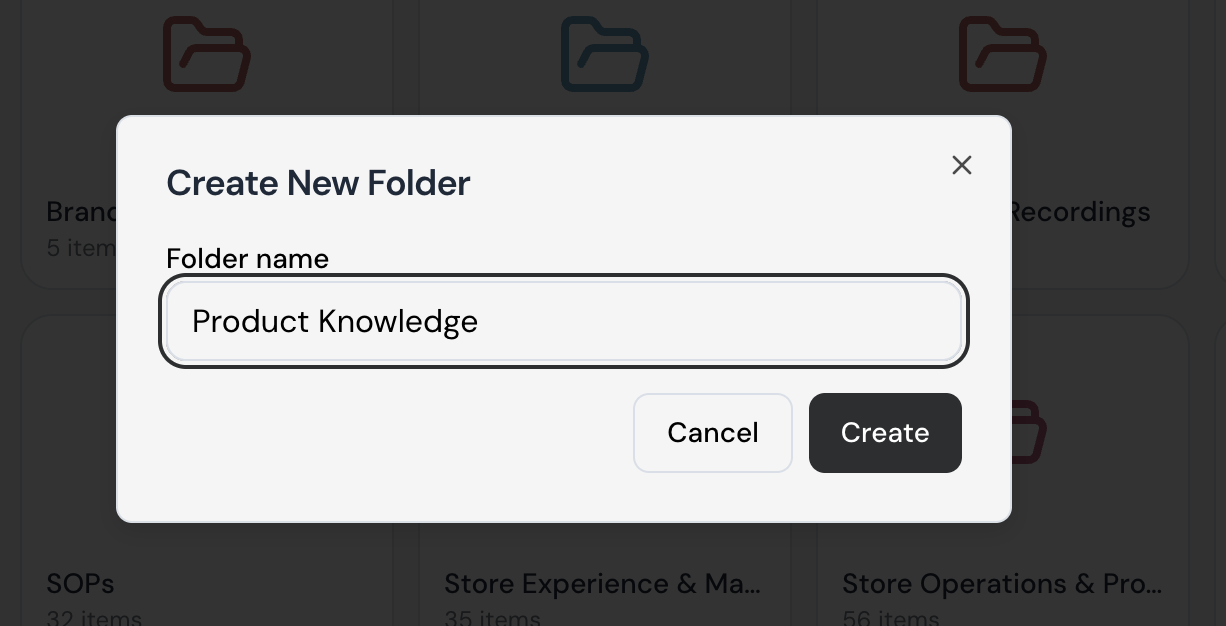
From the Library, click New Folder in the top right corner.
In the dialog that appears, type your folder name in the Folder name field.
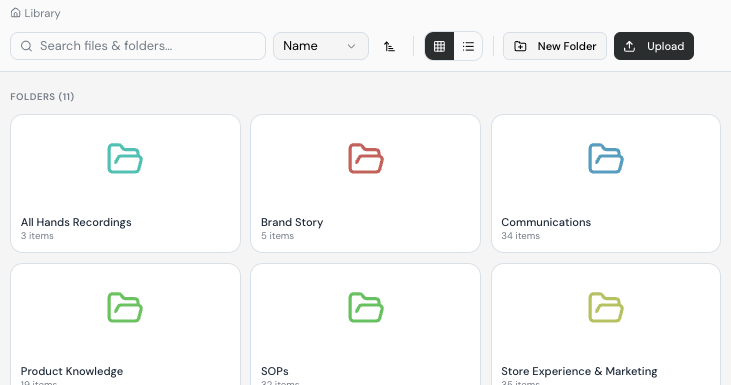
Click Create. Your new folder will appear in the Library alongside your existing folders.
Uploading files
From the Library, click Upload in the top right corner.
Select the file(s) you want to upload from your device.
Once uploaded, your files will be available inside the Library for your team to access.
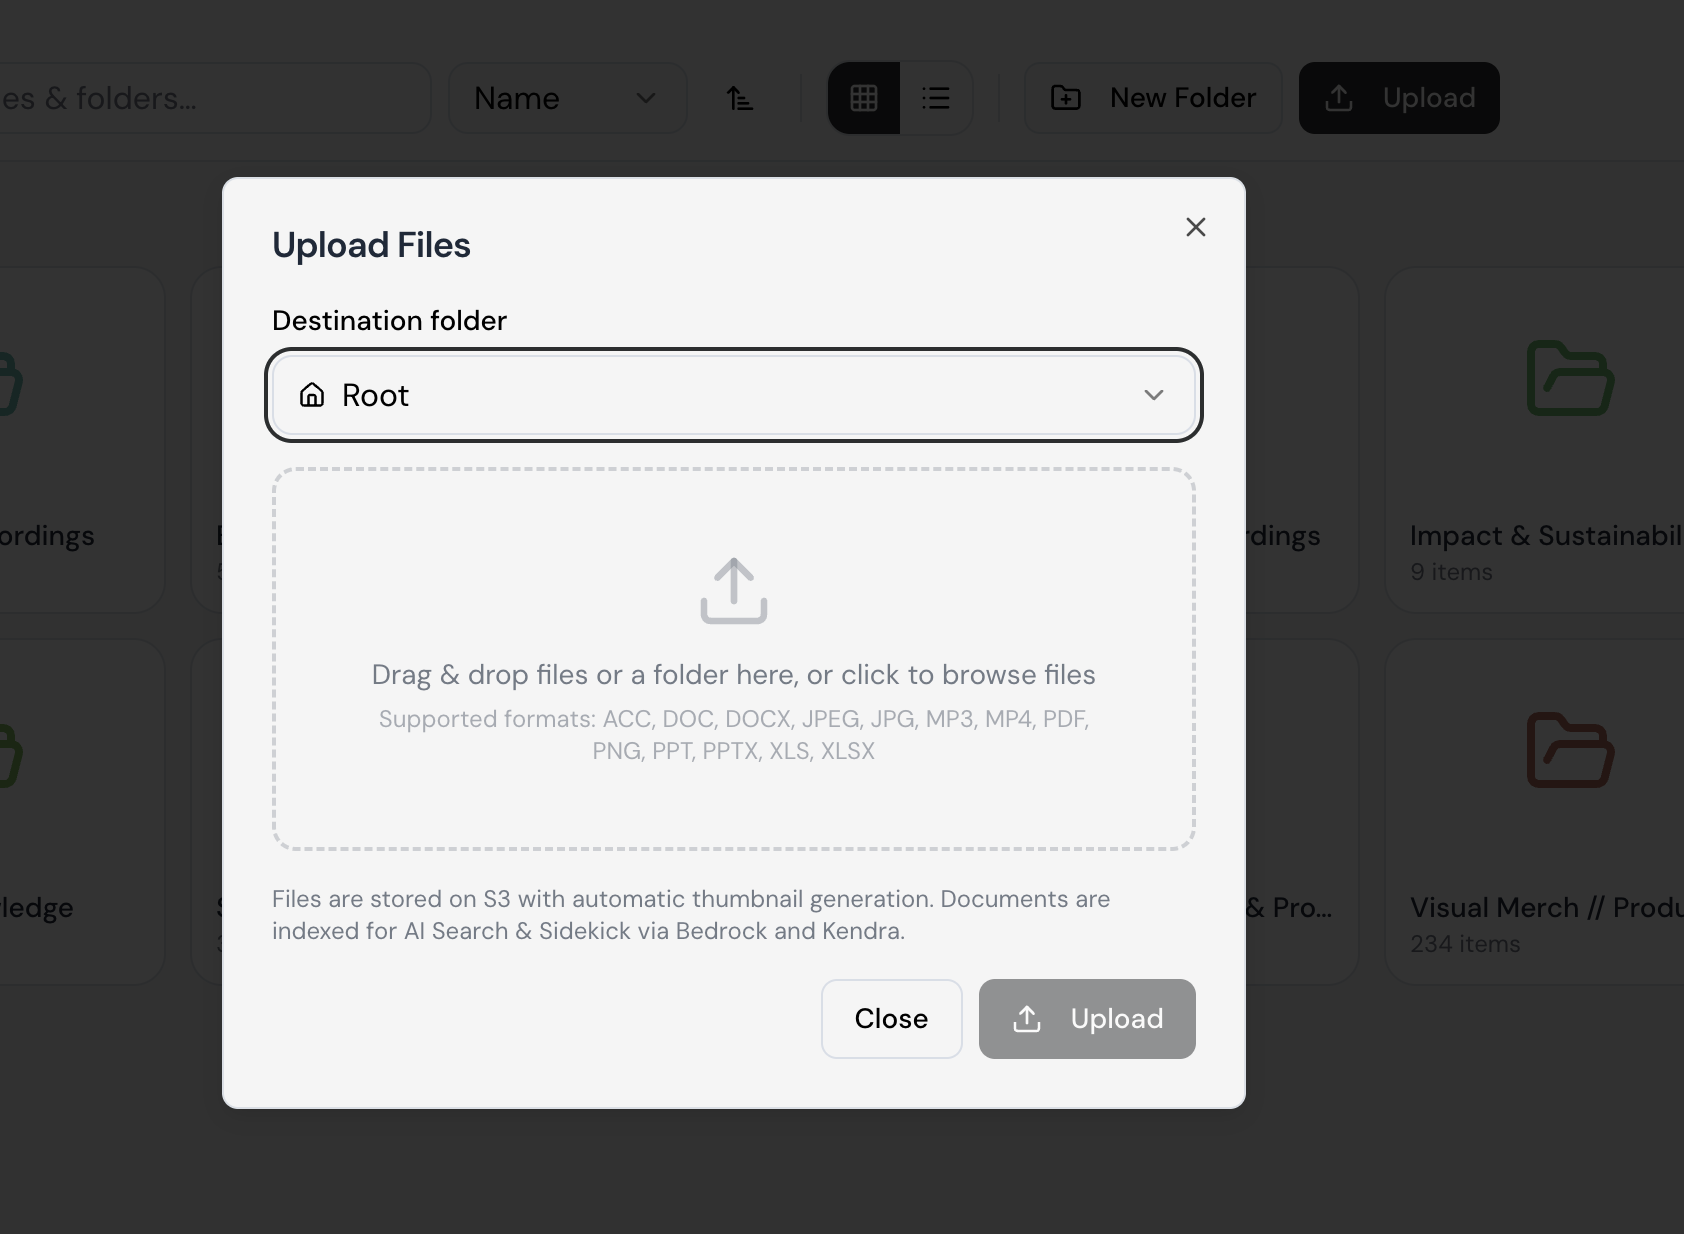
Tip: Navigate into a specific folder before uploading if you want your files to land in the right place automatically.
Browsing your folders
Your Library displays all folders in a grid view by default. You can switch to list view using the toggle in the top right, or use the Search files & folders bar to quickly find what you need. Folders are sorted by name, but you can adjust the sort order using the dropdown at the top.