Connect Channels: Setup & Use Cases
Last updated: August 27, 2026
Connect: Company Chat & Messaging
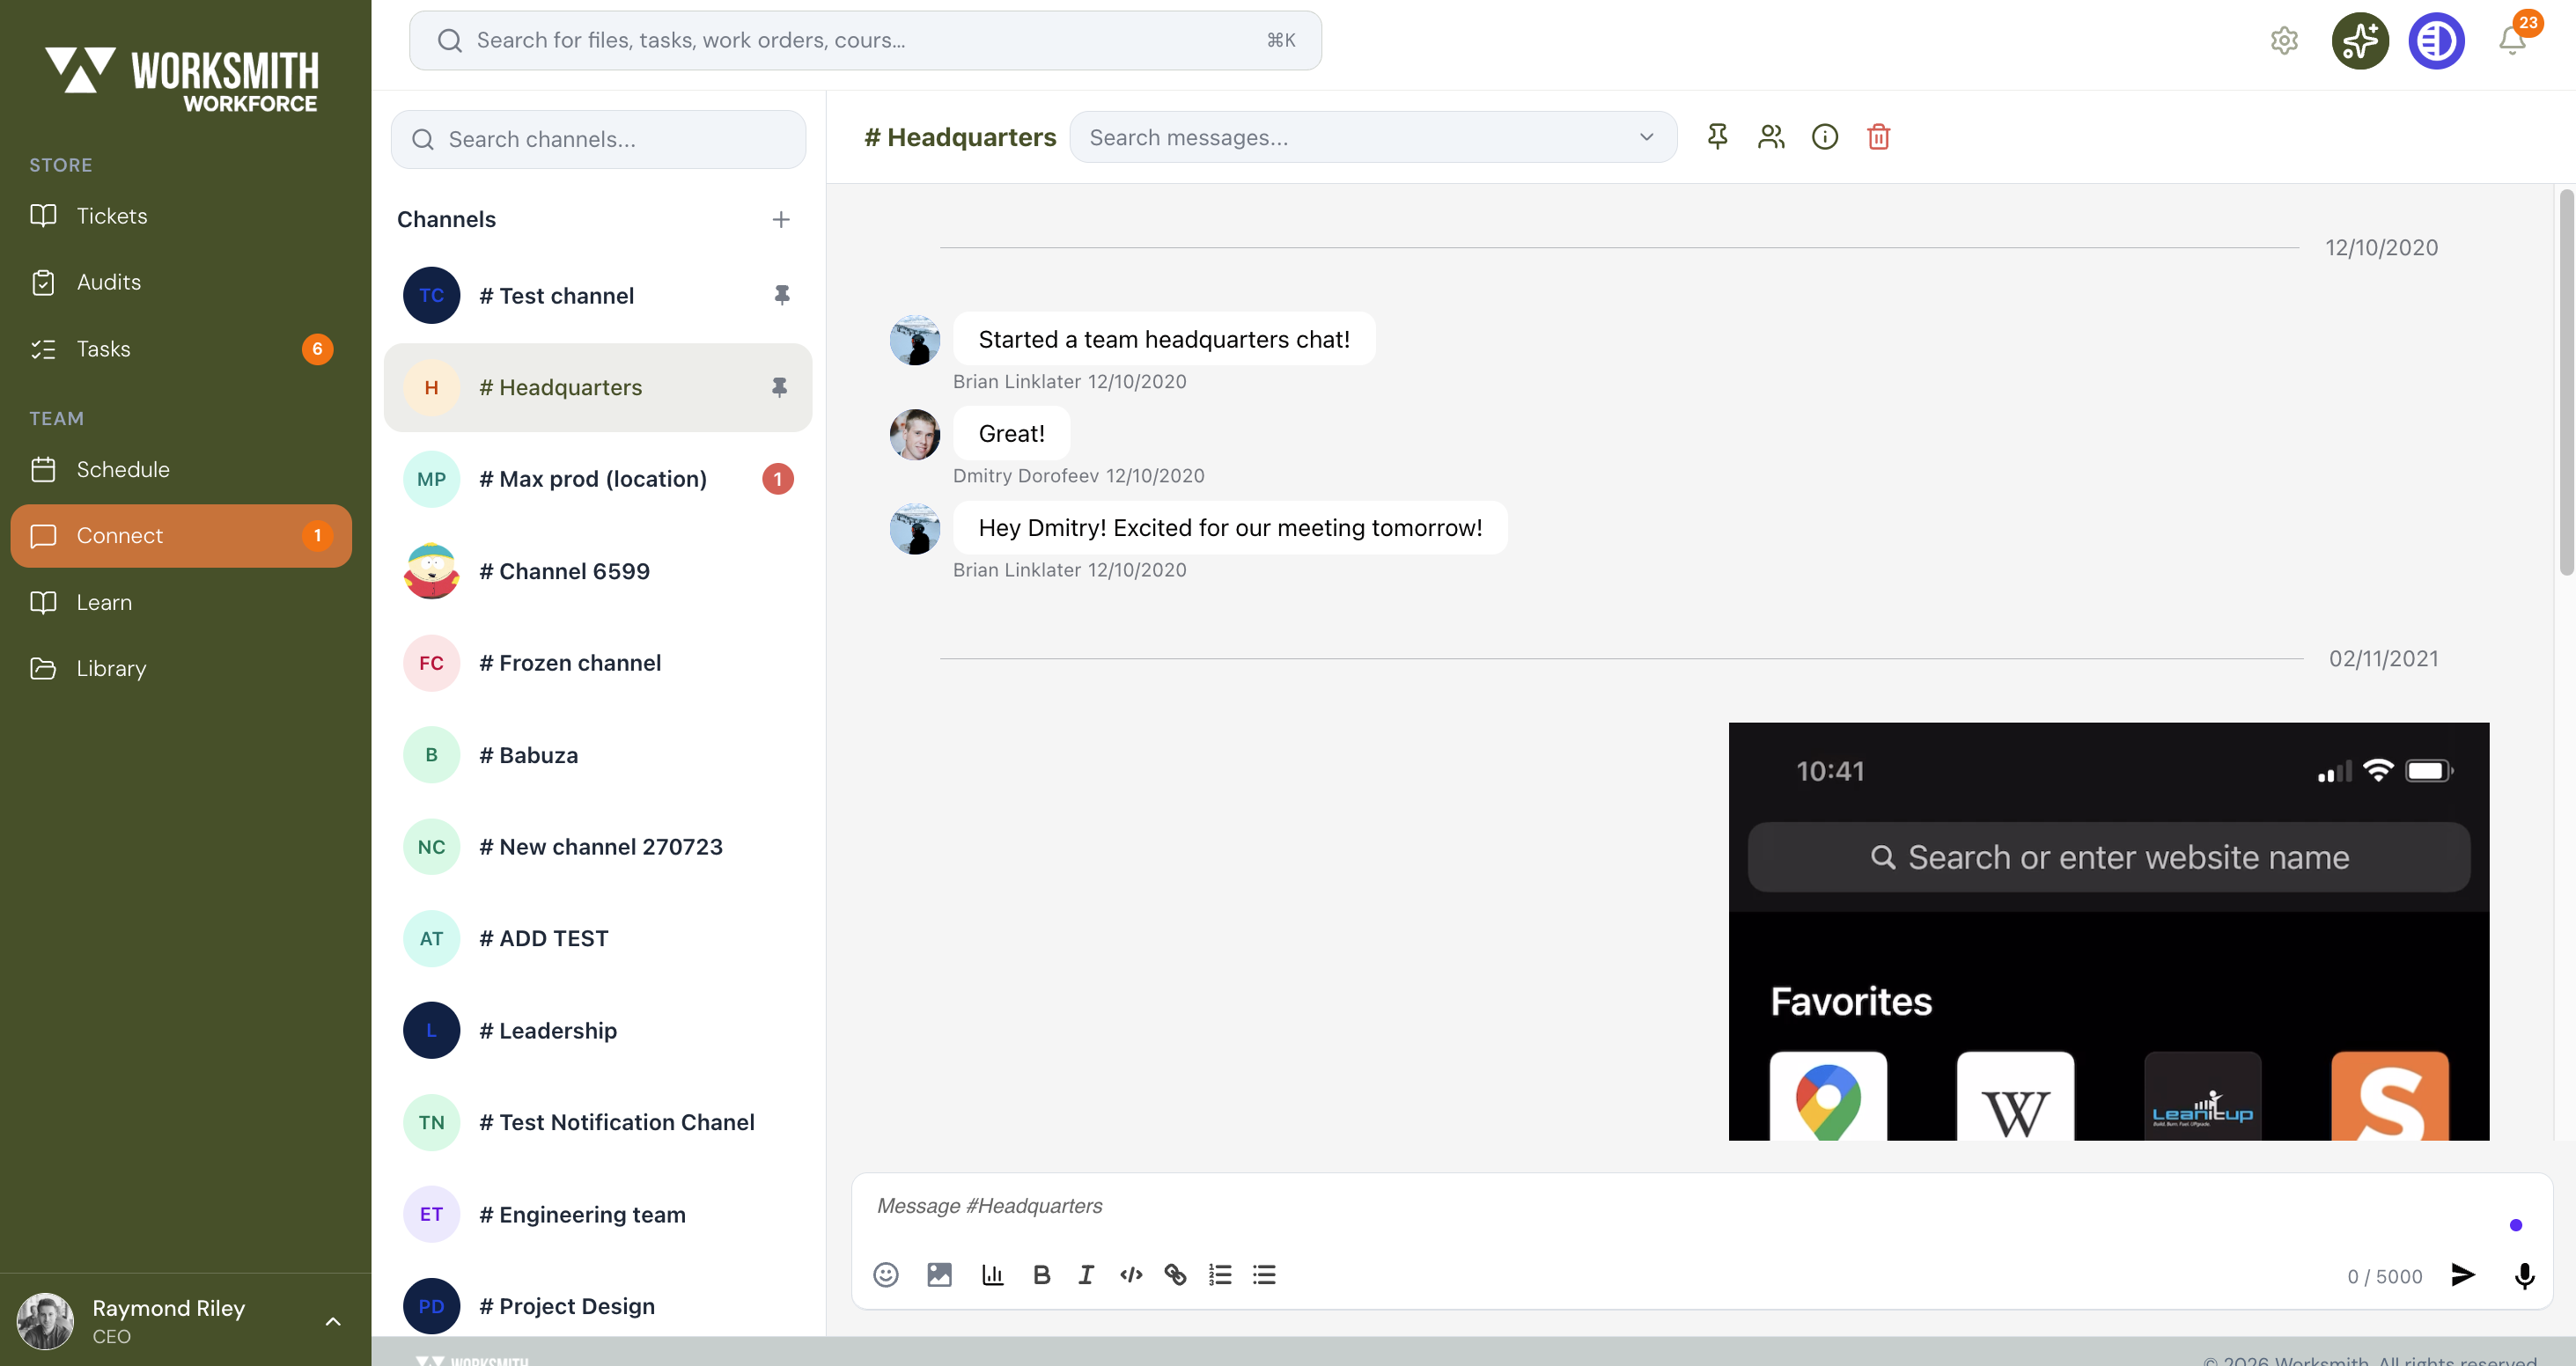
Connect is a tool for channel-based communication and private direct messages.
A user requires the Connect primary permission to be able to at a minimum direct message another user (that must also have Connect permissions).
Channel Creation (in addition to Channel Edit/Delete) is controlled by the Connect: Create/Delete permission, which also acts as a default member of each channel.
Creating a Poll
Gather feedback or make decisions using the built-in poll feature in chat.
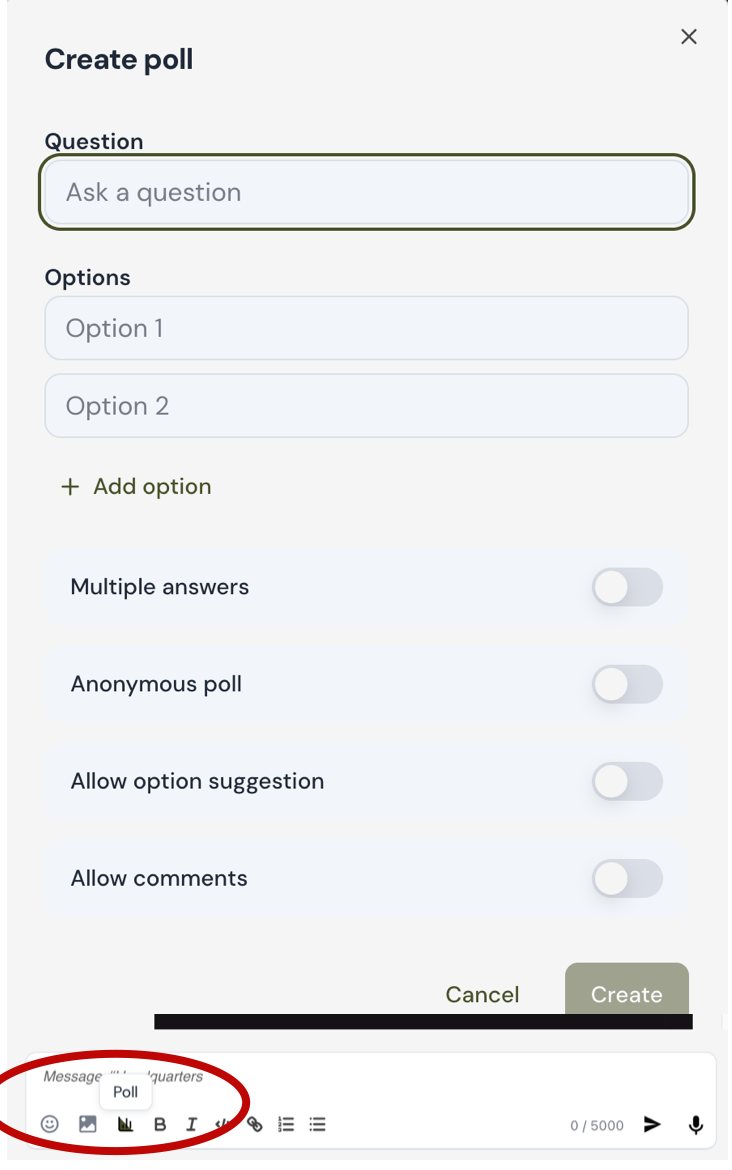
Click the Poll Icon and click the bar chart icon in the message box toolbar.
Enter Your Question in the "Question" field, type the main question you want to ask your audience.
Input one or more answer choices in the "Options" section.
Customize Poll Settings (Optional)
Use the toggles to adjust:Multiple answers: Let users select more than one option.
Anonymous poll: Hide participants’ identities.
Allow option suggestion: Let users add their own answers.
Allow comments: Enable replies beneath the poll.
Click 'Create'- Once you're ready, hit Create to post the poll in the chat.
Creating a Channel
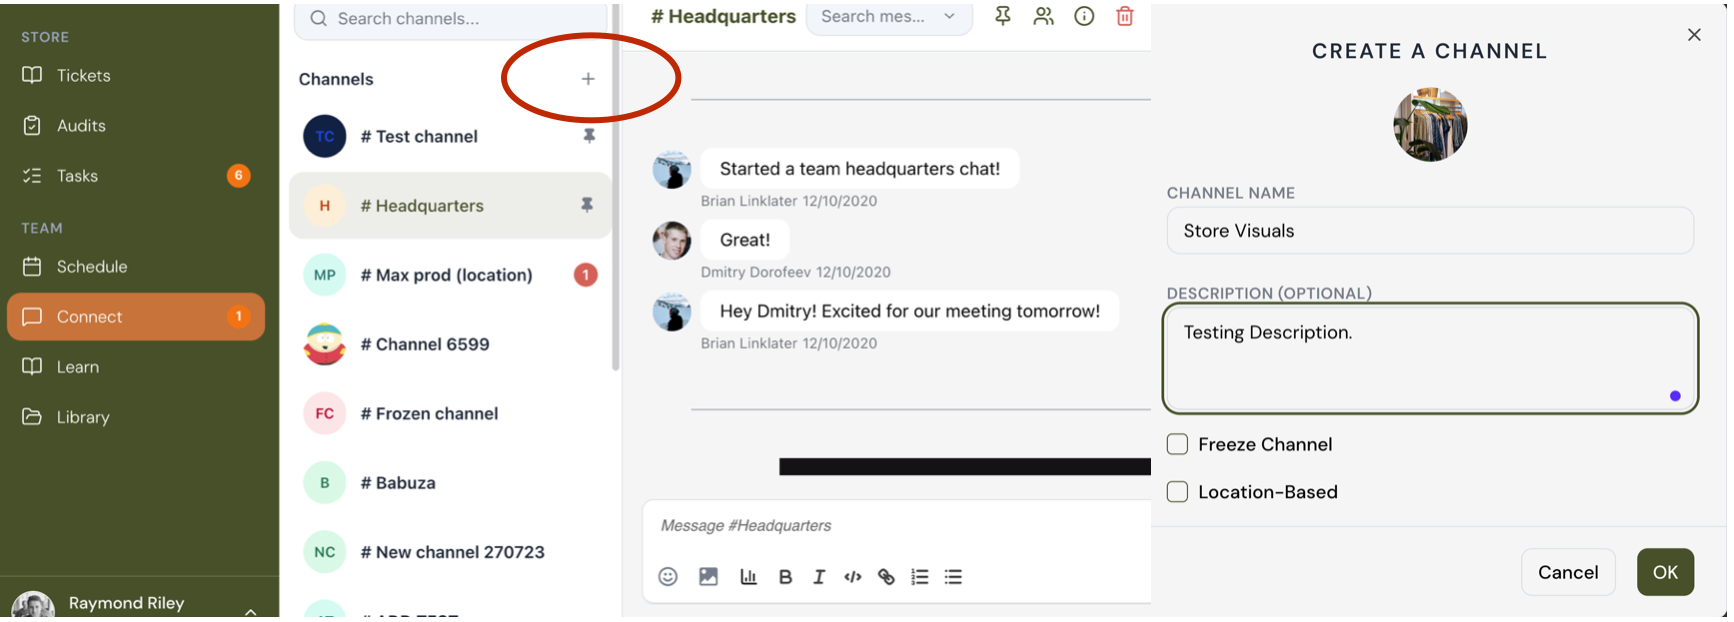
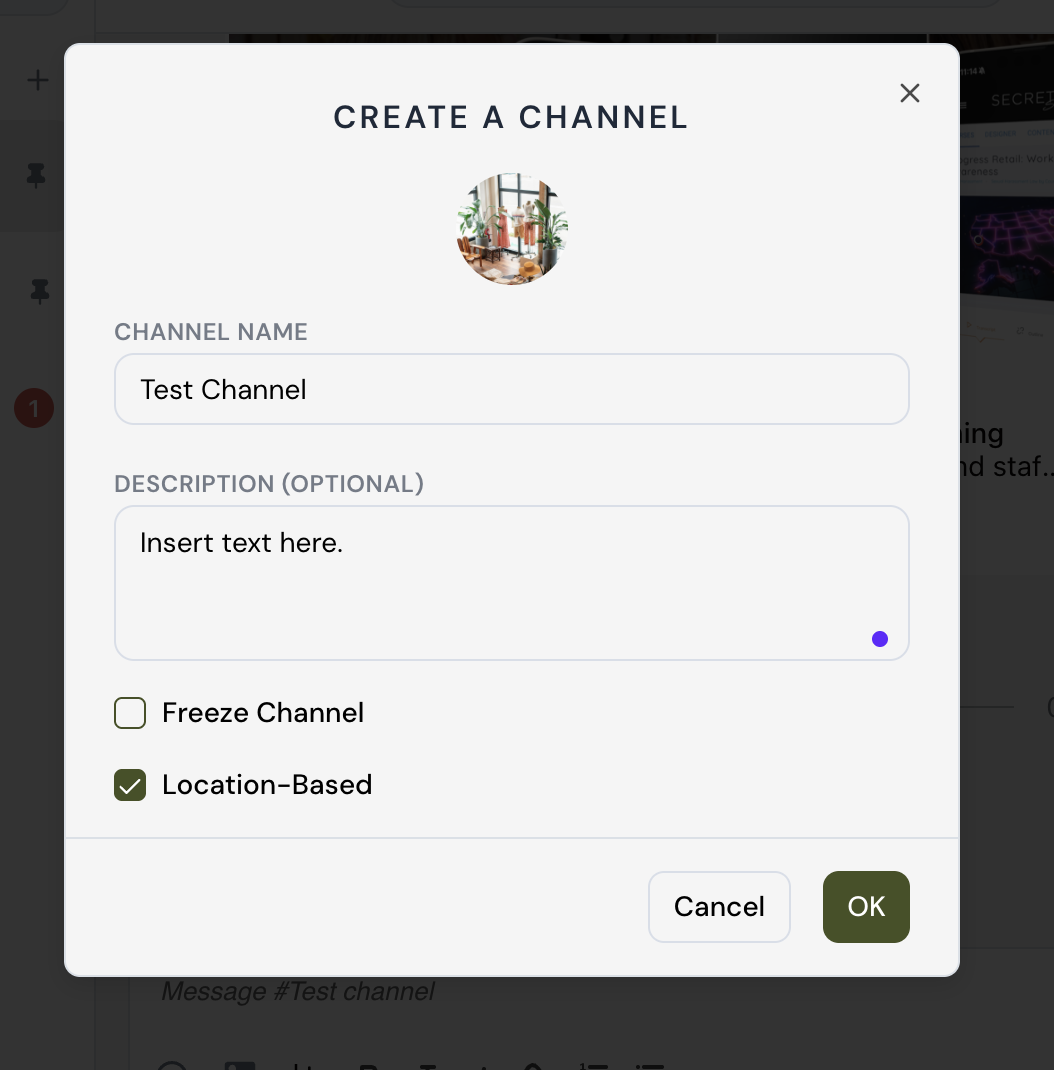
Selecting the + Symbol next to the Channels header provides a slideout modal as pictured above.
When creating a channel, you'll enter a channel name (required), and can optionally add a description and upload an image.
Frozen Channel: If you choose to “Freeze Channel” this means that only users with Connect: Create/Delete permissions can post in the channel. For other channel members (whether invited individually or by role) will have read-only access.
Location Based: If you choose "Location-Based," the channel will automatically be scoped to a specific store or location rather than being visible company-wide. This is useful for conversations that are only relevant to a particular store's team, such as visual merchandising updates or day-to-day store operations.
Inviting Users or Roles to a Channel
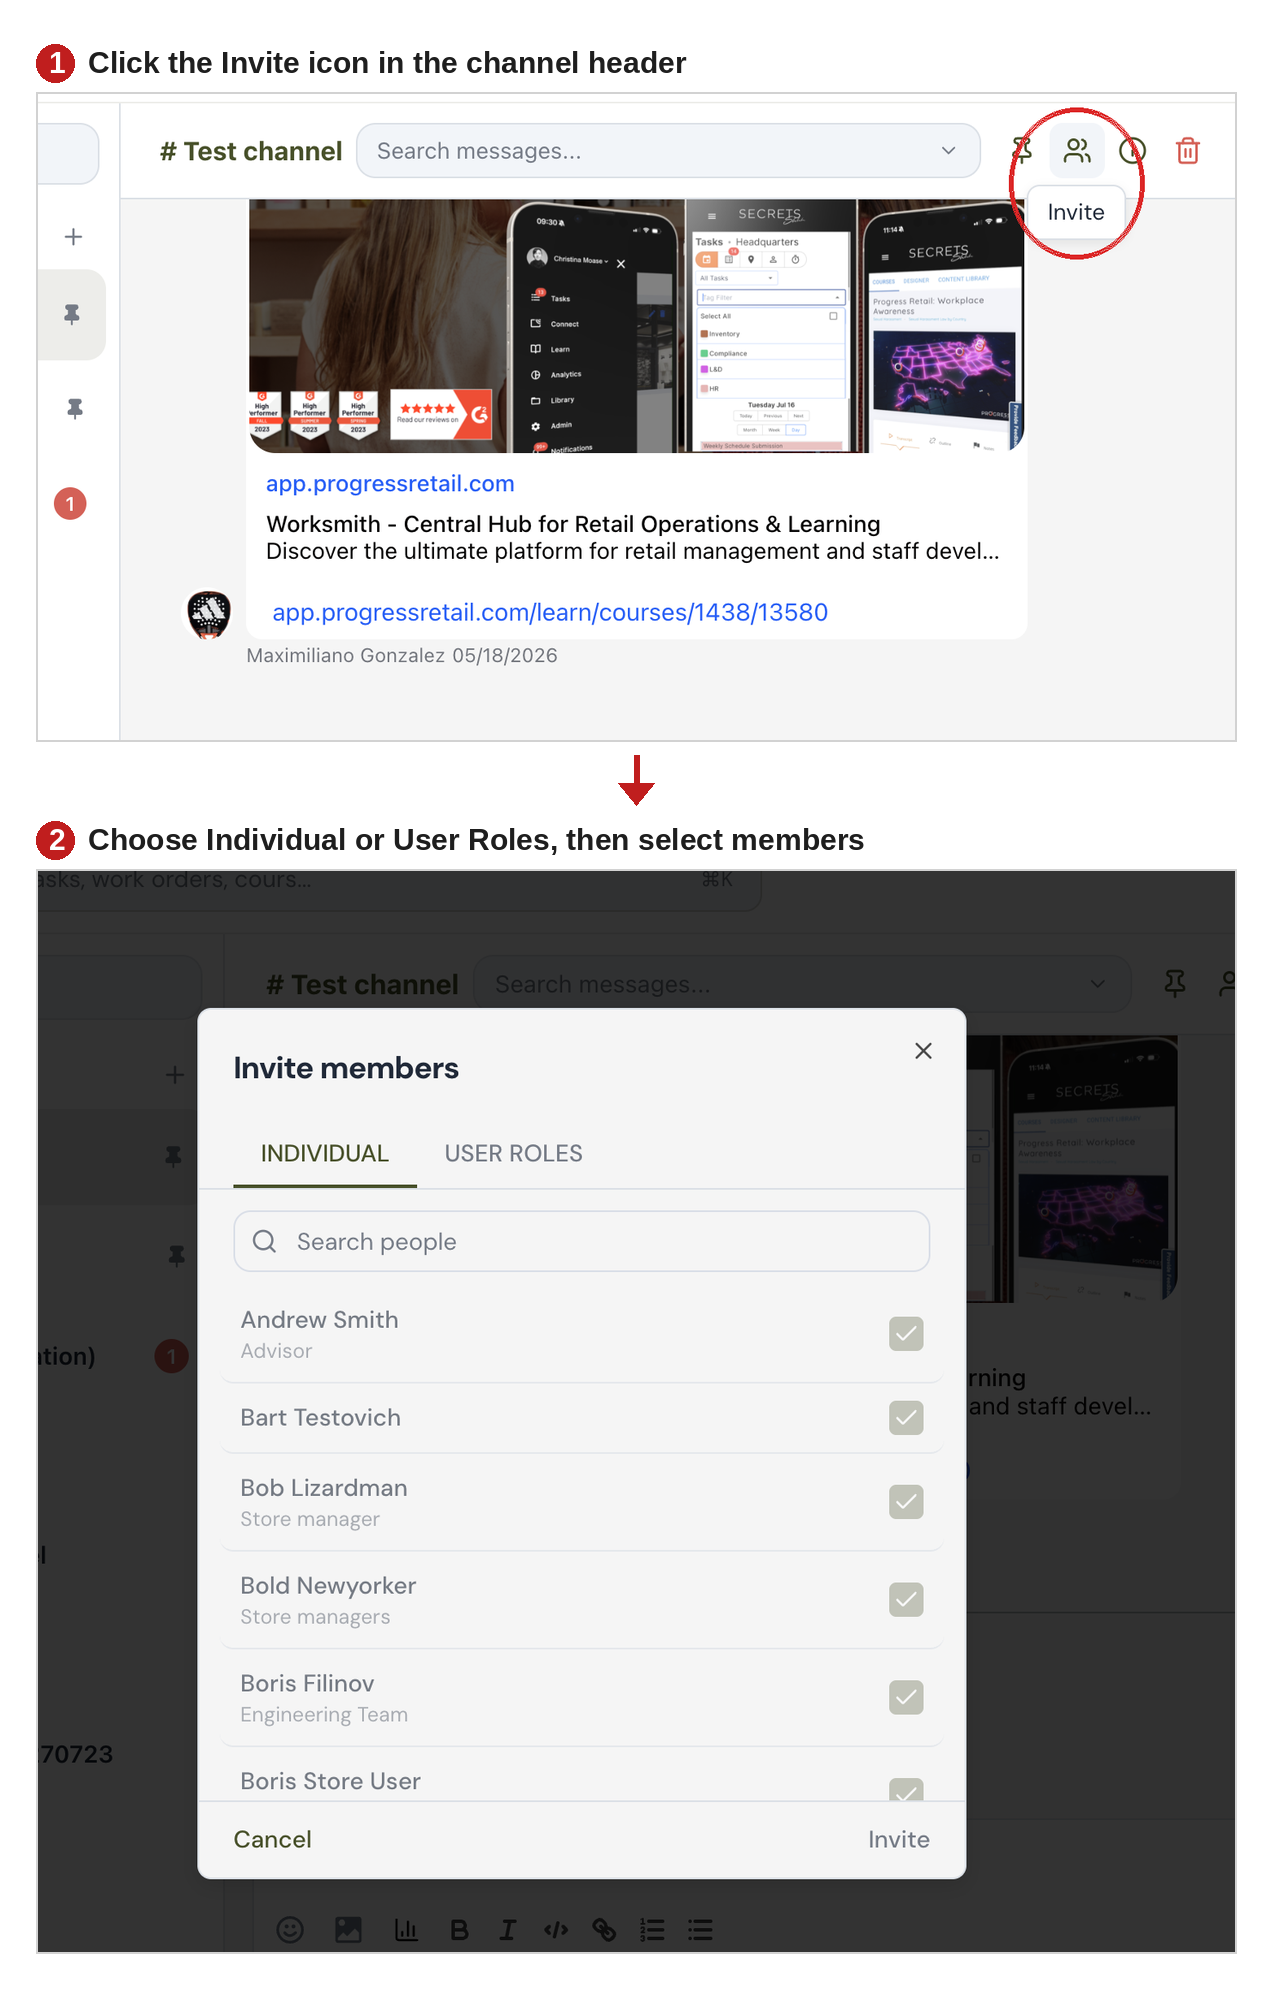
Once a channel has been created in Connect, the next step is to add members. You can do this by inviting people individually or by inviting entire user roles at once.
Opening the Invite Panel
From within your channel (e.g., #Test channel), look at the icon row in the top-right corner of the channel window.
Click the people icon (the one that shows an "Invite" tooltip on hover). This sits alongside the pin icon, the info icon, and the delete (trash) icon.
Clicking this icon opens the Invite members pop-up window.
It is recommended to use Role Assignment, as it is more a scalable way of managing communication channels. The role assignment by channel synchronizes based on the user’s role. For example, if a user’s role changes from Assistant Store Manager, to Store Manager, they will gain or lose access to channels based on the channels that are assigned to the Store Manager role.
Choosing How to Add Members
At the top of the Invite members pop-up, there are two tabs that control how you select who gets added to the channel:
Individual — Lets you search for and select specific people one by one. This is the default view, and it's best when you only need to add a handful of named users.
User Roles — Lets you invite everyone who shares a specific platform role (for example, all Store Managers or all members of the Engineering Team) in one action, instead of checking each person individually. This is the faster option when a whole role/team needs channel access.
Channel Info
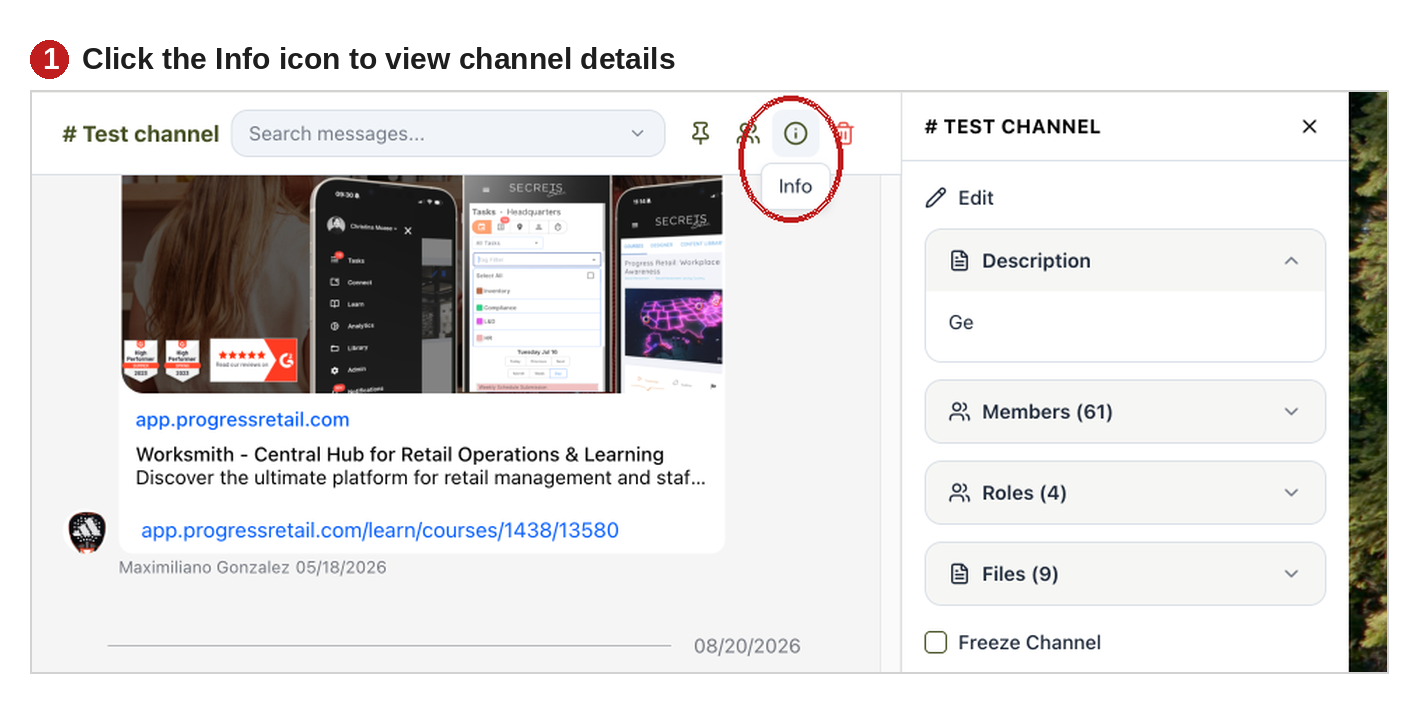
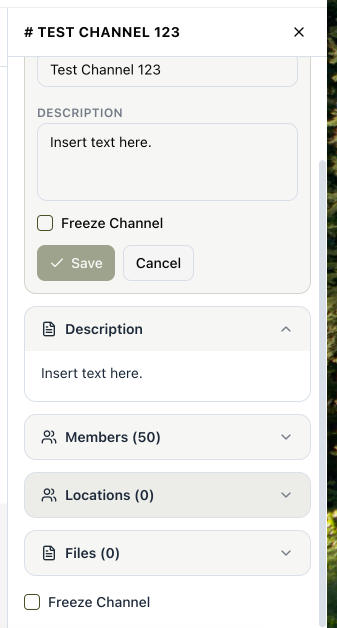
Selecting Info will cause the Channel Info slide out to appear as pictured above. If you have Connect: Create/Delete permissions, this is where you can edit the channel name, description, and review the members (users) within the channel, in addition to the invited roles, and files or media shared.
If you have Connect: Create/Delete permissions, you also can freeze the channel.
Any user with Connect permissions can DM another user.
Location-Based Channels


Create a Channel:
Selecting the + Symbol next to the Channels header provides a slide out modal as pictured above.
Name your channel (e.g., Bond Street Flagship).
Enable the Location-Based option-click “ok”
Add by Location:
In the Invite Members screen, select the “Location-Based” tab.
Choose from your available store or region lists (e.g., Global Retail, Canada, USA).
Click Invite.
As team members are added to or removed from stores, the channel updates in real time—no manual effort required.
Automatic Synchronization with Your Organization:
Once a channel is set up with location-based settings, it stays continuously in sync with your organizational hierarchy. That means when users are added to or removed from a store, district, or region, they’re automatically included or excluded from the corresponding channels—no manual updates required. This keeps communication tightly aligned with your operational structure as it evolves.
Changing Existing Channels:
It's important to note that channels can't be switched between location-based and role-based after creation. For example, if a channel was initially set up using roles, and you now want it to be location-based, you'll need to create a new channel with the updated configuration. This helps ensure that your communication logic remains clean, consistent, and easily managed.