How to Build a Quiz
Last updated: September 29, 2026
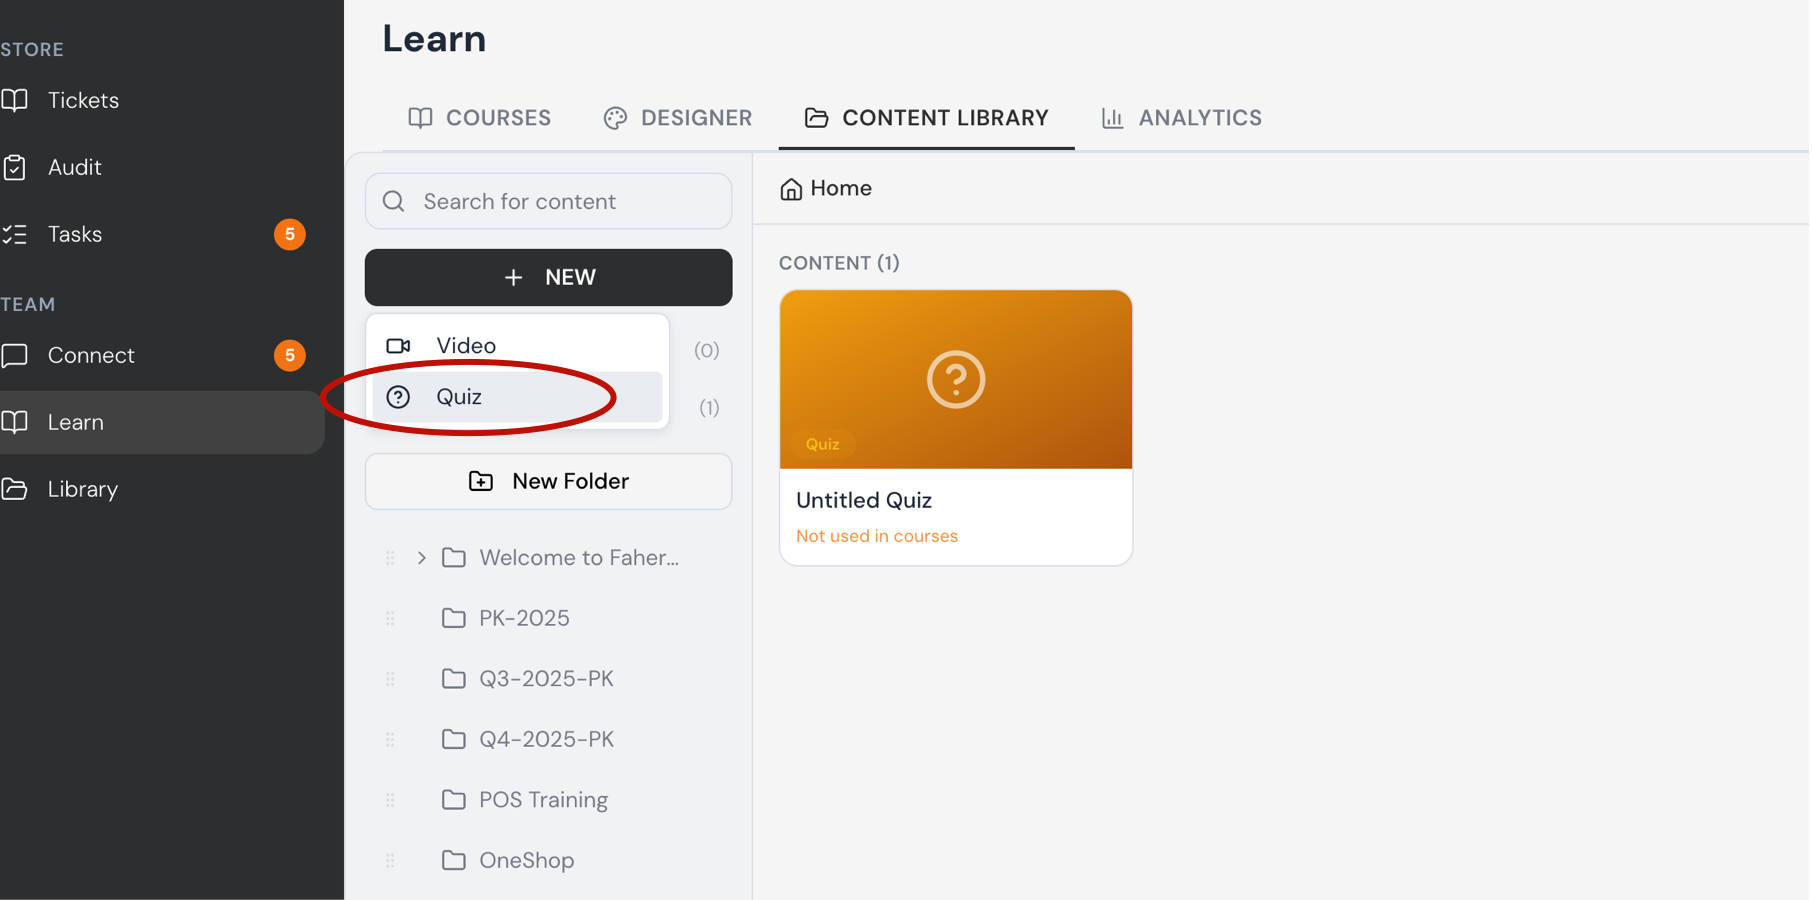
Navigate to "Learn", "Content Library", and select by Clicking "+ New", this opens a dropdown with two content types: Video and Quiz. The number in parentheses next to each shows how many of that type already exist in the current folder.
Selecting Quiz creates a new quiz item, which appears in the content area on the right as a card labeled "Quiz."
Newly created quizzes default to the title "Untitled Quiz" and are marked "Not used in courses" until they're added to a course.
Click into the quiz card to open it and begin editing its questions and content.
Opening a quiz takes you to its editor, where you can click Back to Library at any time to return to the Content Library.
Use the Quiz Title field to rename the quiz, and the Description field to add a brief summary of what it covers.
Under Settings, you can set a Time Limit (in seconds) for the quiz; leaving it at 0 means unlimited time.
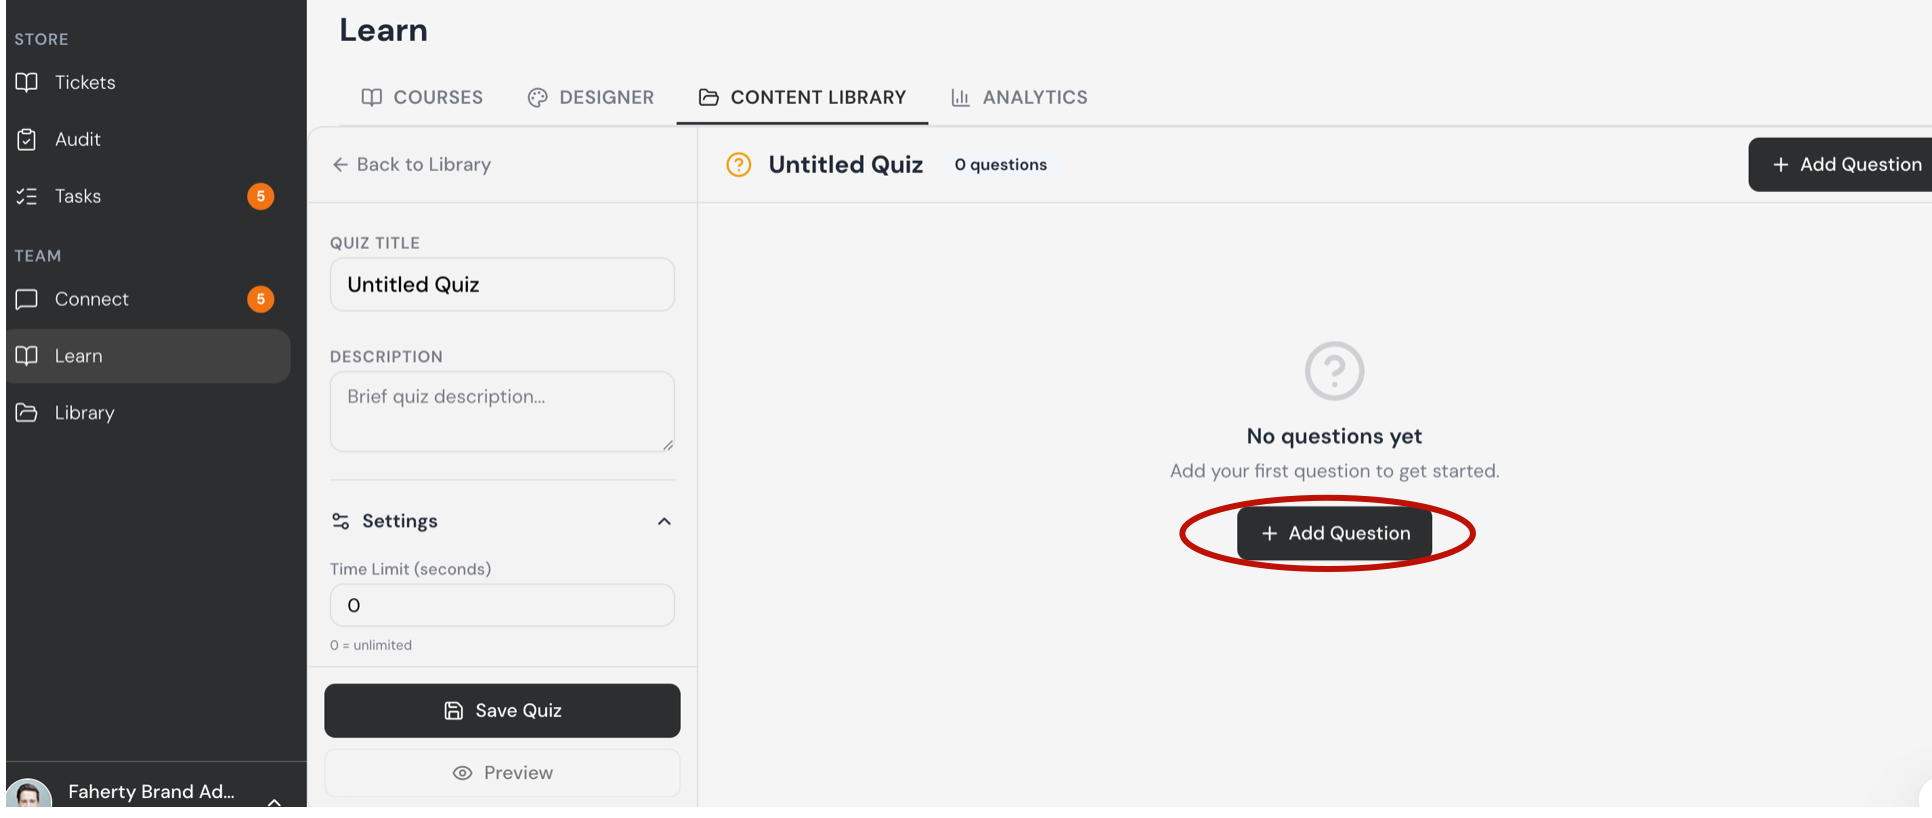
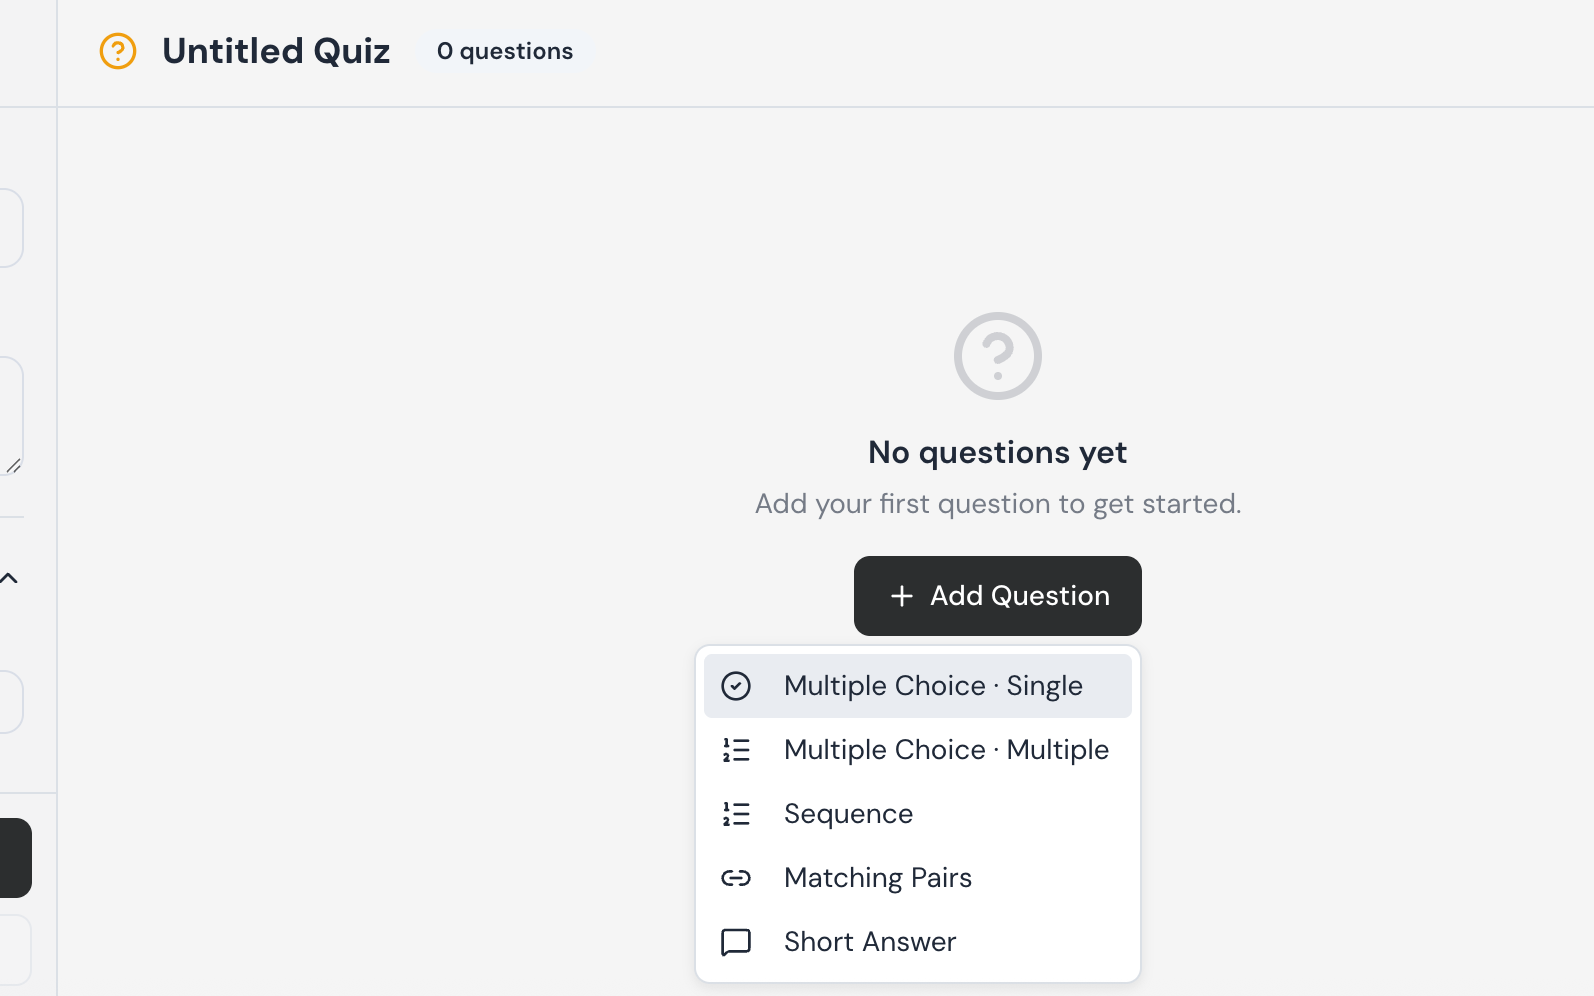
Clicking + Add Question opens a dropdown of question types to choose from: Multiple Choice · Single, Multiple Choice · Multiple, Sequence, Matching Pairs, and Short Answer.
Multiple Choice · Single: lets learners pick one correct answer from a list of options.
Multiple Choice · Multiple allows more than one correct answer to be selected.
Sequence asks learners to place items in the correct order.
Matching Pairs has learners connect related items from two columns.
Short Answer requires learners to type a brief written response.
Upon saving the quiz question, you will return to the Quiz Builder. If the next question has the same format (especially True or False), it is recommended to clone the quiz question to retain all settings, and merely edit the question and answer components.
If the next question format is different, select the type of question from the “New Question” dropdown.
Question Details:
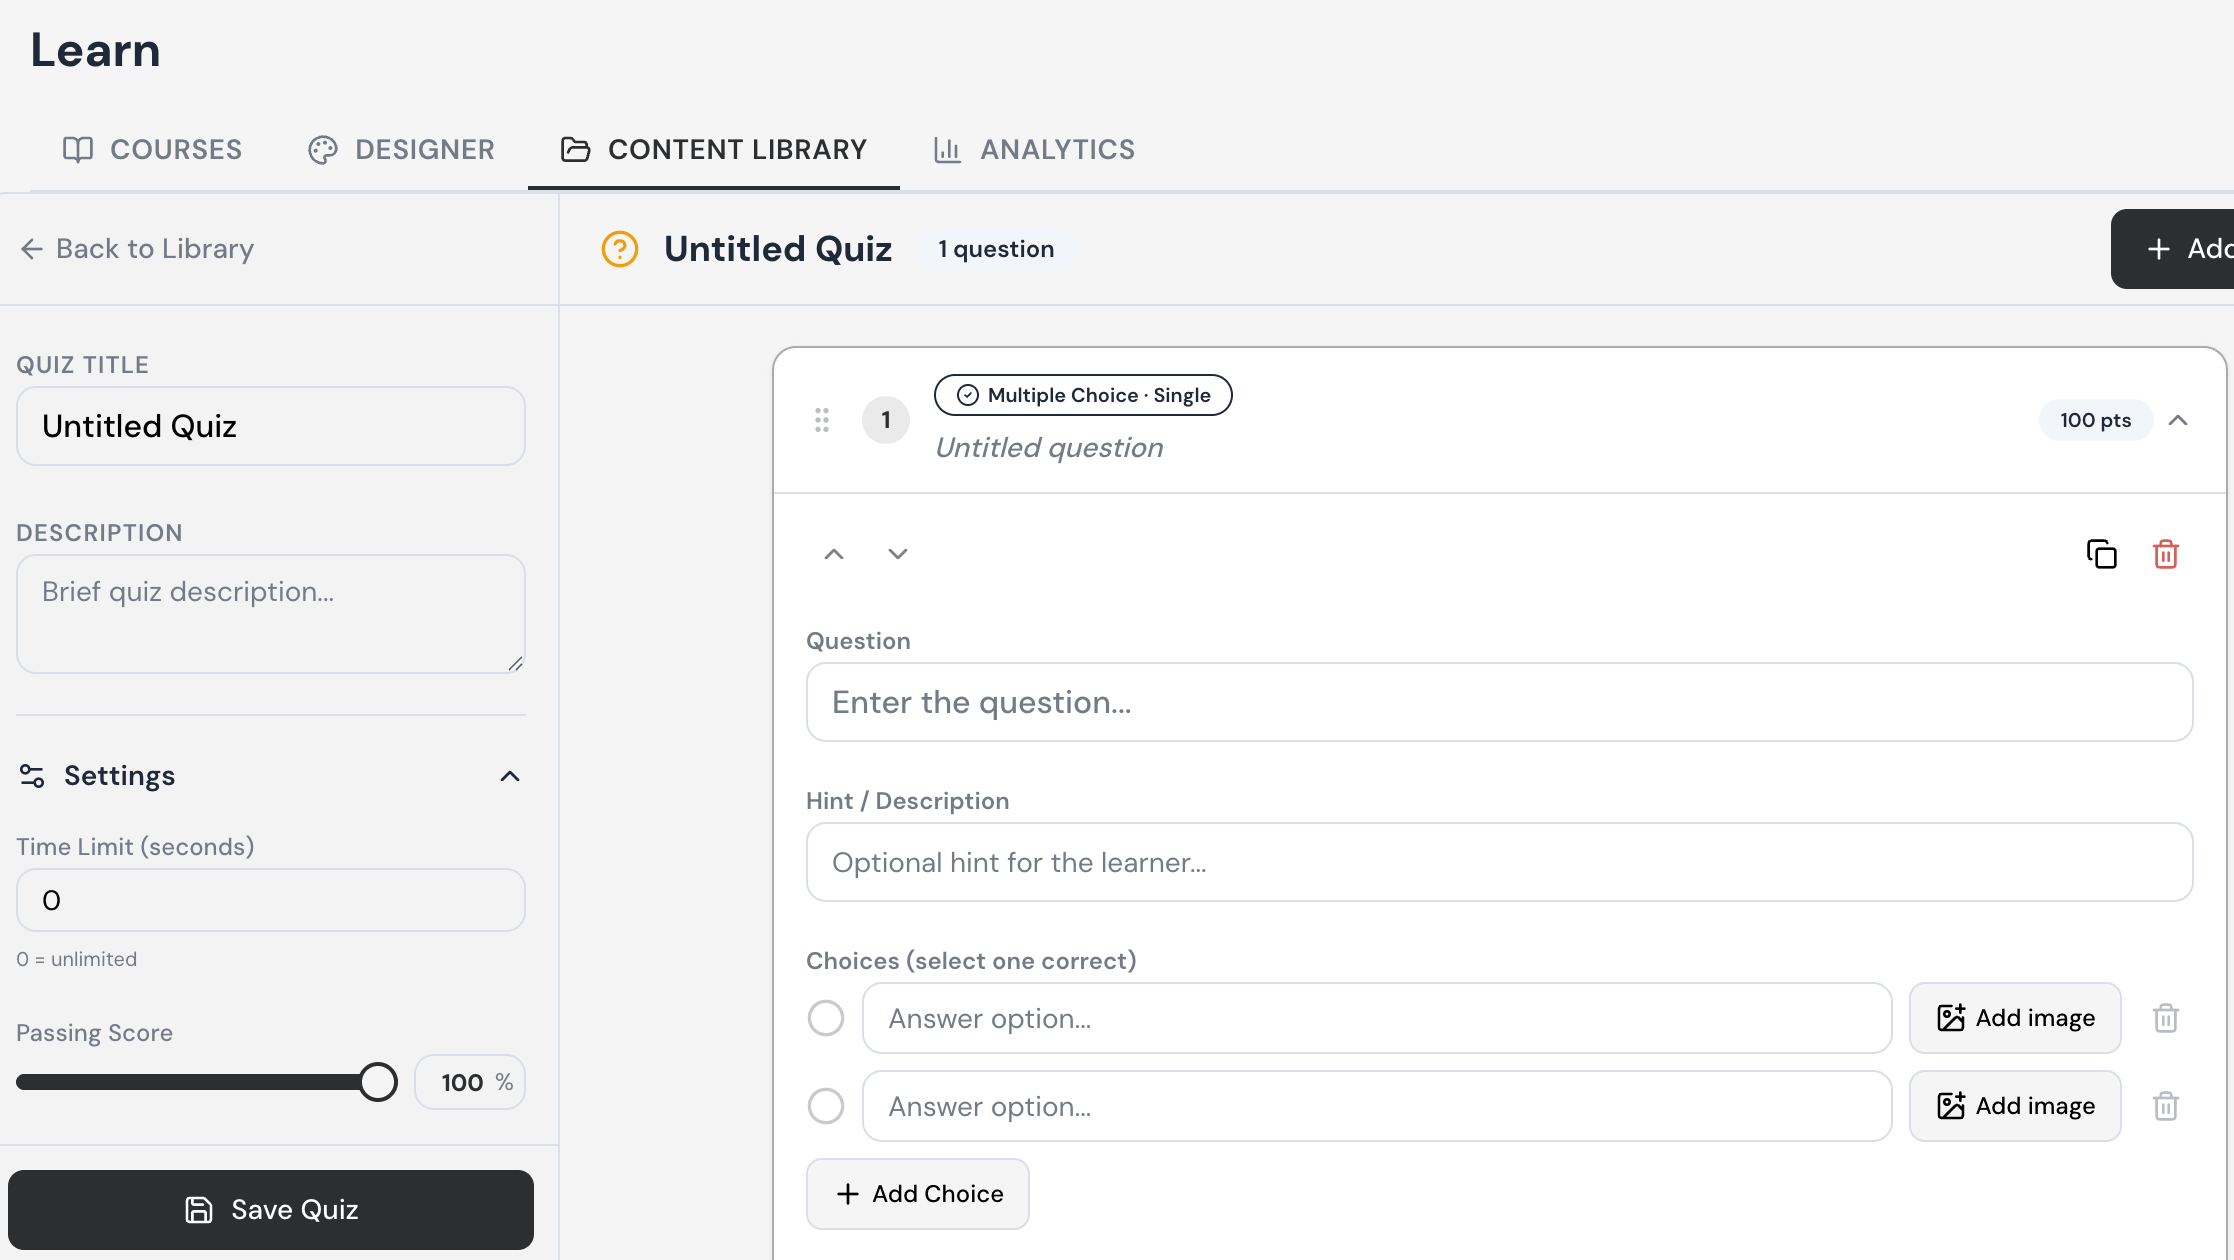
Choose the question type — check the badge at the top of the question card (e.g. "Multiple Choice · Single") to confirm it matches what you want; this determines how learners will answer.
Enter the question text — click the Question field and type out the actual question, replacing the "Enter the question…" placeholder.
Add a hint (optional) — use the Hint / Description field if you want to give learners a nudge; this won't be graded, just shown as support.
For example: "Please select the correct answer", or "Please select True or False."
Fill in the answer choices — type each answer option into its text field under "Choices." At least two fields are provided by default.
Mark the correct answer — click the radio button next to the choice that's correct. Only one can be selected for a single-answer multiple choice question.
Add images to choices (optional) — click "Add image" next to any choice if you want to pair it with a picture instead of relying on text alone.
Add more choices if needed — click "+ Add Choice" below the existing options to add another blank answer field.
Remove unwanted choices — click the trash icon next to any choice you want to delete.
Reorder, duplicate, or delete the whole question — use the drag handle (six dots) to move it, the copy icon to duplicate it, or the trash icon (top right of the card) to remove it entirely.
Collapse or expand the card — use the up/down arrows if you want to tidy up your view while working on other questions.
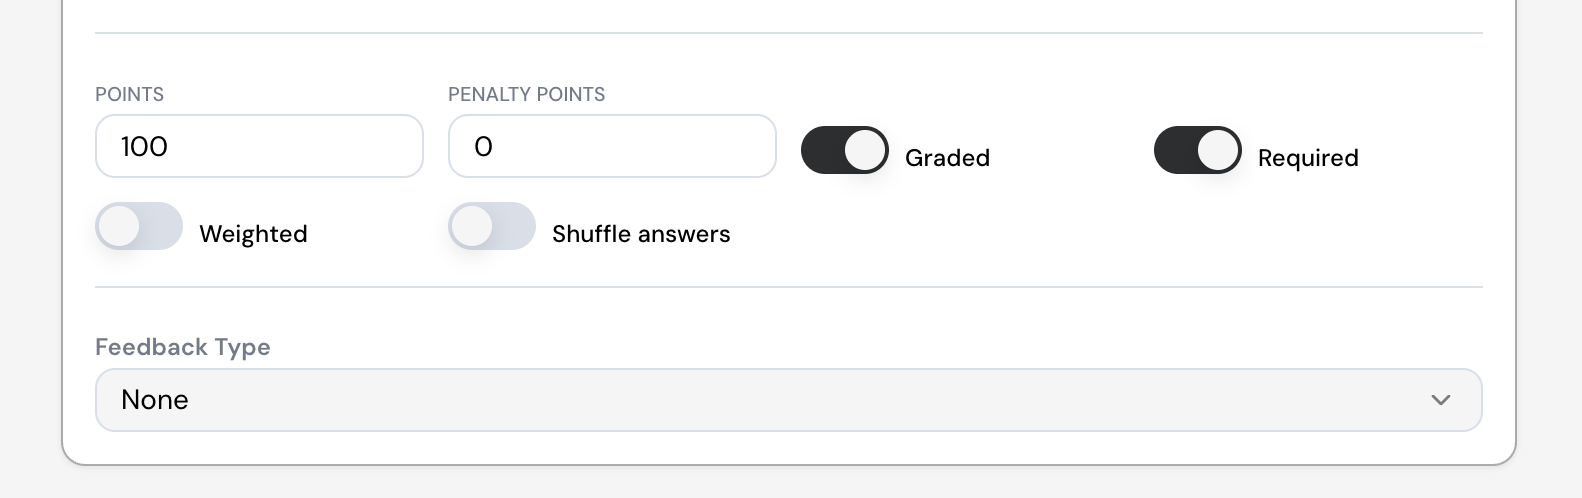
Set the Points — enter how many points a learner earns for answering this question correctly. It's currently set to 100.
Set Penalty Points (optional) — enter a value here if you want to deduct points for a wrong answer. It defaults to 0, meaning no penalty.
Toggle Graded on or off — leave this on if the question should count toward the quiz score; turn it off if you want it to be informational only (e.g. a practice or ungraded check). It's currently on.
Toggle Required on or off — leave this on if learners must answer the question to submit the quiz; turn it off to make it optional. It's currently on.
Toggle Weighted on or off — turn this on if you want the question's points to be scaled or weighted differently within the overall scoring (rather than counted at face value). It's currently off.
Toggle Shuffle answers on or off — turn this on if you want the answer choices to appear in a random order for each learner, which helps prevent answer memorization. It's currently off.
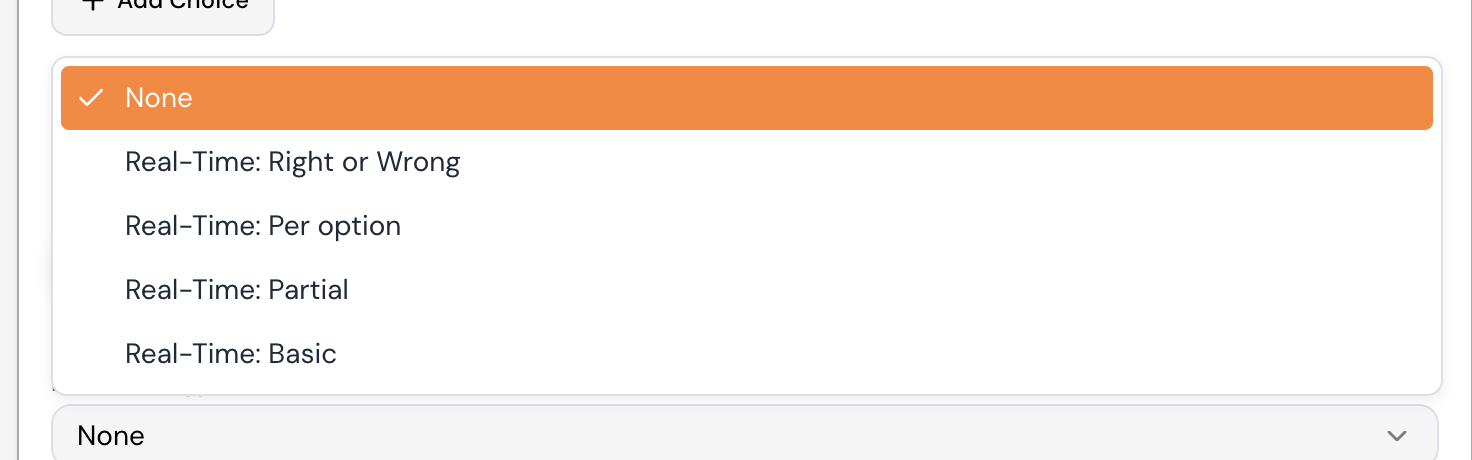
Choose a Feedback Type — click the dropdown type that fits your quiz:
None — no feedback is shown after the learner answers (currently selected).
Real-Time: Right or Wrong — tells the learner immediately whether their answer was simply correct or incorrect.
Real-Time: Per option — gives feedback on each individual answer choice the learner interacts with, not just the final selection.
Real-Time: Partial — accounts for partially correct answers, useful for questions where more than one choice contributes to the score.
Real-Time: Basic — provides a simple, general response after answering, without the added detail of the other real-time options.
Previewing a Quiz:
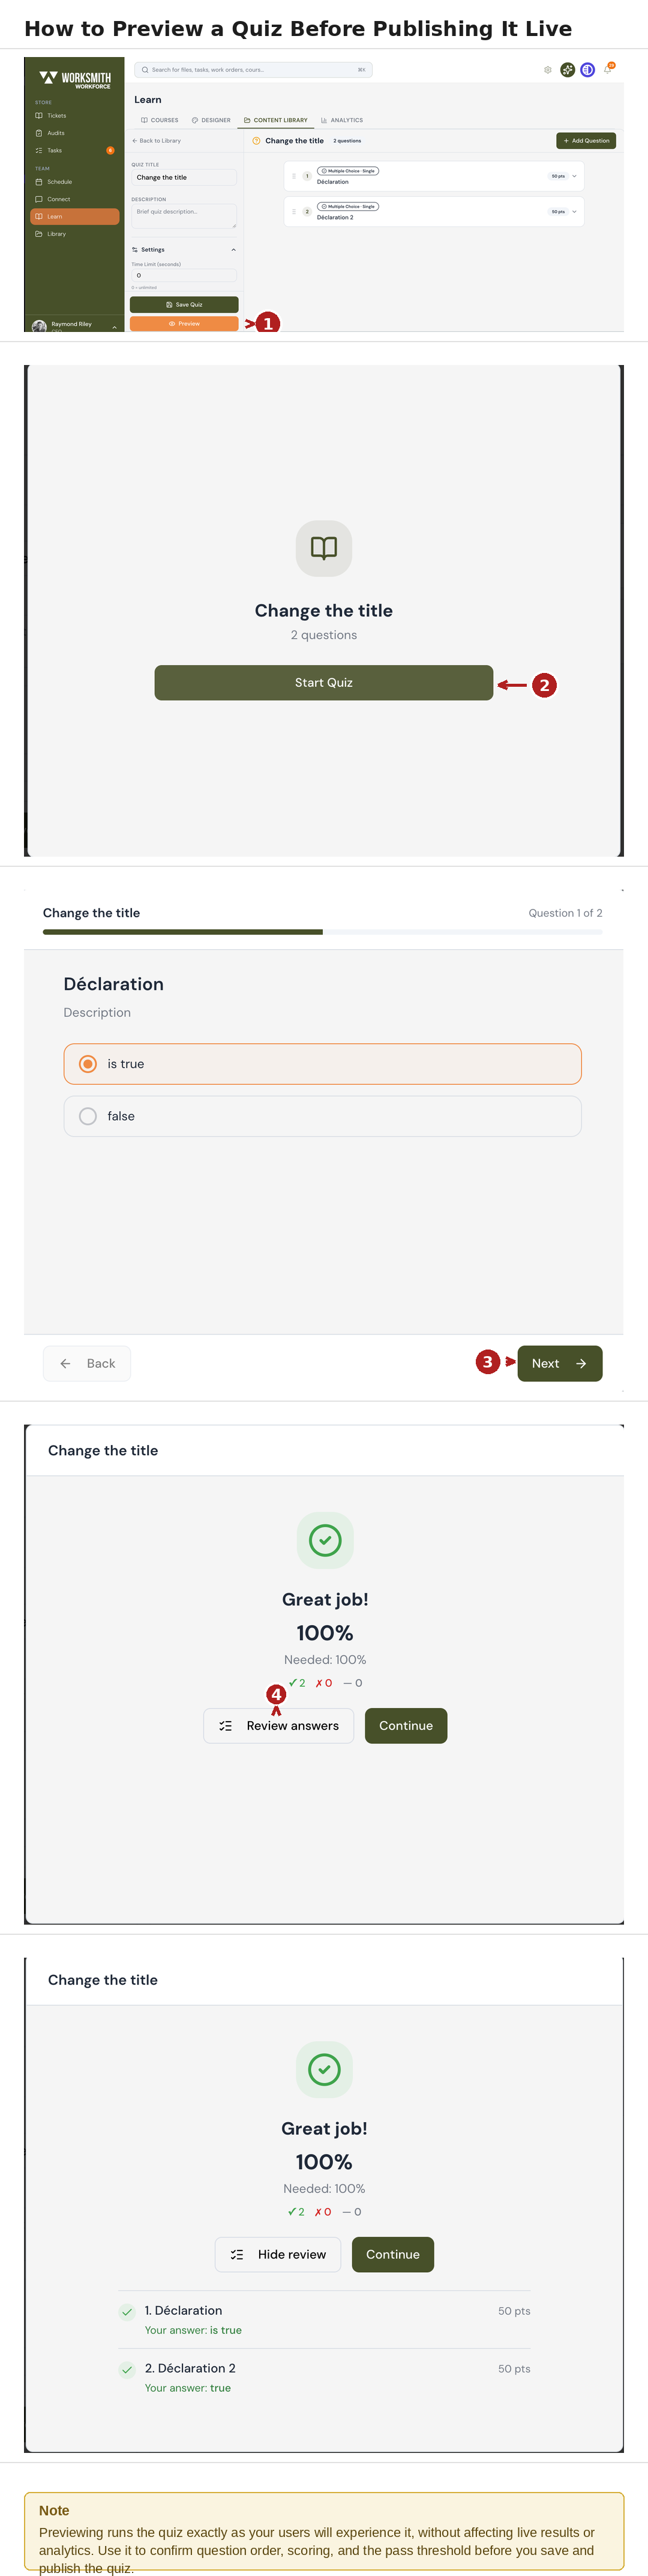
In the Content Library, open the quiz you would like to check, then select "Preview".
The preview opens exactly as users will see it, click "Start Quiz" to begin.
Answer each question as a user would, then click "Next" to move through the quiz questions.
When you finish the quiz questions, review the score and pass threshold, then click "Review Answers."
Check each question against the answer you gave to confirm it scores correctly.